GherFlow Documentation
Welcome to the official GherFlow documentation. This guide will help you understand how to use the visual Gherkin editor, connect to GitLab, and execute your automated or manual tests both locally and in CI/CD pipelines.
What is Gherkin?
Gherkin is a simple, structured language used in Behavior Driven Development (BDD) to describe how software should behave from a user’s perspective.
It uses plain English keywords such as Feature, Scenario, Given, When, Then, And, But to define test cases in a readable way that both developers and non-technical stakeholders can understand.
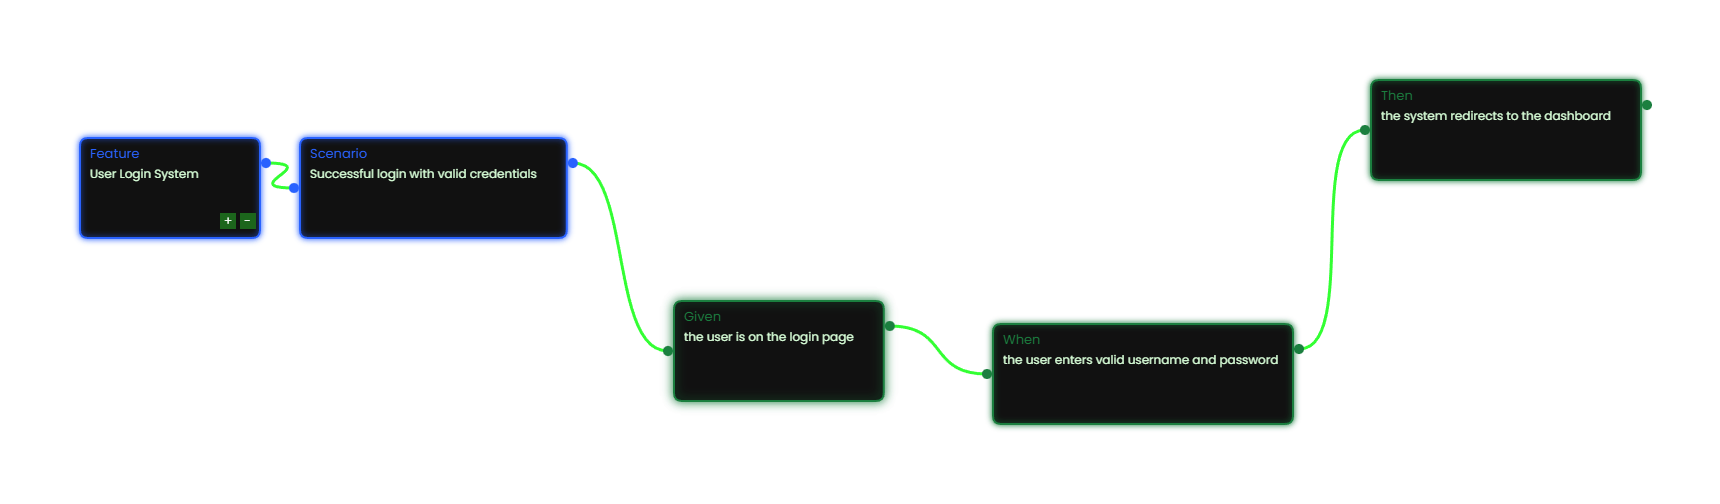
Each line in a Gherkin file expresses a step in the behavior of the system. For example:
Feature: Login Functionality
	  Scenario: Successful Login
		Given the user is on the login page
		When they enter valid credentials
		Then they should be redirected to the dashboard
This format bridges communication between business goals and technical implementation. Instead of writing traditional test scripts, teams write living documentation that clearly defines expected outcomes. Gherkin syntax is supported by popular automation frameworks such as Cucumber, Behave, and SpecFlow.
But what is GherFlow?
While Gherkin defines the structure of BDD test cases in plain text, GherFlow transforms that process into a fast and highly visual experience.
It is a web-based Gherkin editor that lets you build, connect, and execute feature files without writing the syntax manually.
Instead of typing each Given, When, or Then line, you can design complete scenarios through a node-based interface that shows the logical flow of your tests.
This visual approach helps testers and developers work together more efficiently,
reduces syntax errors, and makes the process of creating automated test documentation far more intuitive.
GherFlow keeps the clarity of Gherkin while adding a modern, collaborative layer for speed and simplicity.
Currently, GherFlow supports the core Gherkin elements:
Feature, Scenario, Given, When, Then, and And.
We are actively expanding support to include other BDD components such as
But, Scenario Outlines, Background, Rules, and
Examples for actual logic and multi-test execution in upcoming updates.
GherFlow was build and designed for smaller and solo teams who want to work faster and more intuitively,
but it can also be seamlessly utilized within corporate environments, where we would love to collaborate and look for new solutions together.
Creating a New Feature
To start a new test feature:
- Click New Project on the control bar.
- Add nodes:
Feature→Scenario→ Steps (Given,When,Then,And). - Connect them visually to form the test flow.
- Export your project as a
.featurefile. - And to show your peers what you made, you can export the graph as a
.pngfor presentations or documentations.
Importing a Feature File
To import an existing .feature file:
- Click Import Feature in the control bar.
- Select a
.featurefile from your local system. - You can also drag / drop a
.featurefile from your local system to the editor. - The editor only allows a limit of 5 scenarios within your feature.
- The editor will auto-generate the nodes and connections in real-time.
Local Runner
The Local Runner executes your steps directly in the browser with visual feedback, while it is not connected to any CI/CD or a specific project, it can still be usefull for manual testing or to see if your test works correctly. You can also validate each step manually with a (Pass/Fail).
// Example output
[START] Executing local feature...
Given the user opens the login page
✅ Step passed.
When they enter credentials
✅ Step passed.
Then they should see the dashboard
✅ Local feature run complete.
GitLab Integration
GherFlow connects to GitLab to push your .feature files and to execute pipelines directly.
Automated CI/CD Integration, is still in a early phase so bugs can occur. To use the GitLab integration:
- Go to Tools → GitLab.
- Enter your Personal Access Token (Scopes
api,read_repository,write_repository,create_runner,manage_runner). - Select a repository and branch.
- Push your current feature, this automatically goes to a
/featuresfolder. - Go to the GitLab Runner Terminal to activate the feature in your gitlab pipeline.
Tips
- Use Local Runner for quick manual validation before pushing to your own CI.
- Your Gherkin syntax and format must be valid, indentation matters!